Whose watermark can you legally remove?
Your own exports, and images you own. The mark a design app put on your file, an old watermark of your own you want off a photo you shot, a stamp an editing app added to something you made. For a seller that is usually a corner badge on a catalogue image she needs clean before it goes to Meesho or Flipkart, both of which reject overlay text on the primary photo.
It is not for taking a photographer’s mark off their photograph, or a stock library’s off a preview. Those marks exist to identify an unlicensed copy, and removing one does not license it — it just produces an unlicensed file with the reminder taken off. That is a licence breach and often a copyright one, and no section of this page covers it.
Scoping it that way costs traffic. It also means the page is defensible, which the alternative is not. If you are clearing your own mark off 40 photos before an Instagram or WhatsApp drop, everything below applies.
How do you remove a Canva watermark properly?
The real answer first, because it is quicker than any editing and it is what you want.
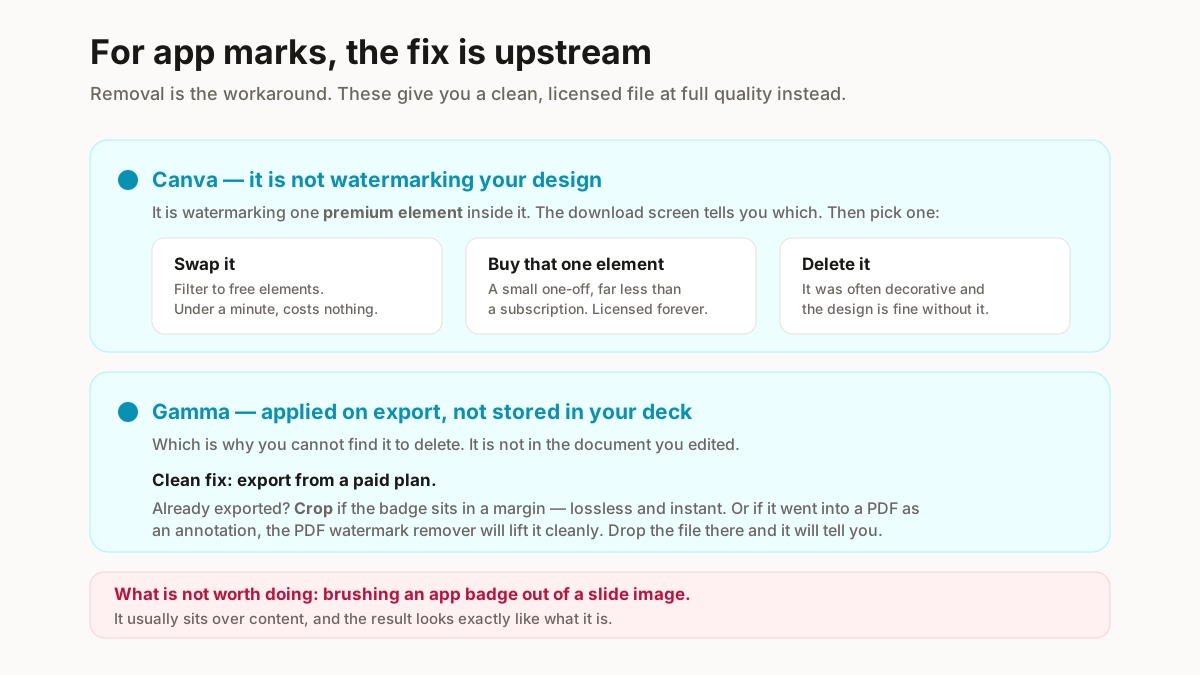
A Canva watermark means one element in your design is a premium element. Canva is not watermarking your design — it is watermarking the paid asset inside it. So the fix is to deal with that element rather than the export.
Finding which element it is
On the download screen Canva lists the premium items in your design, usually with a crown icon in the layers or a prompt at export. Click through and it will show you exactly which one is triggering it — frequently a stock photo or an icon you added early and forgot.
Then pick one of three
Swap it for a free equivalent. Canva’s free library is large and the filter for free elements is one click. For most seller designs this takes under 2 minutes and costs nothing.
Buy the single element. Canva sells individual premium elements for a small one-off amount — far less than a subscription, and it licenses that asset for that design permanently.
Delete it. Often the premium element was decorative and the design is fine without it.
Any of the three gives you a clean, licensed export in the original quality. Editing the watermark out afterwards gives you a degraded image you are not licensed to use — worse on both counts.
How do you get the Gamma badge off a deck?
Same shape of answer, different mechanism.
Gamma adds its mark on export, on the free plan — typically as a small badge on the exported PDF or images instead of as an object living in your deck. That is why you cannot find it to delete: it is not in the document you edited, it is applied on the way out.
So the clean route is the plan. Exporting from a paid Gamma plan produces the deck without the badge, at full quality, in one step.
If you already have the exported file and cannot re-export, there are two partial options. When the badge sits in a margin, cropping is lossless and takes seconds. When it went into a PDF as an annotation, our PDF watermark remover may lift it cleanly — drop the file there and it will tell you.
What is not worth doing is brushing it out of a slide image. A Gamma badge usually sits over content, and the result looks exactly like what it is.
What about ShareChat, InShot and PicsArt marks?
A whole category of apps stamp their own name on what you export, and for almost all of them there is a setting rather than a removal job.
Check the app’s export or settings screen first. Many put the watermark toggle there and default it on — you turn it off once and every future export is clean. Some tie it to a paid tier, some to watching an ad, some to nothing at all beyond finding the switch.
Re-export instead of edit wherever the original project still exists. An export is lossless from the source; a brushed-out mark is not.
Crop when it is in a corner. Most of these badges sit in a corner or margin precisely so they are visible without covering content — which also makes them croppable without losing anything that matters. Crop first, then resize: a 1200 x 1200 catalogue image cropped after resizing lands under the pixel floor the marketplaces enforce.
Brushing it out is the last option, not the first, and it is the right one only when the source project is gone and the mark is over something you need.
This page covers image apps. Video watermarks are a different job and are deliberately out of scope — a mark burned into a video is present on every frame, and none of this applies.
When will the repair look obviously wrong?
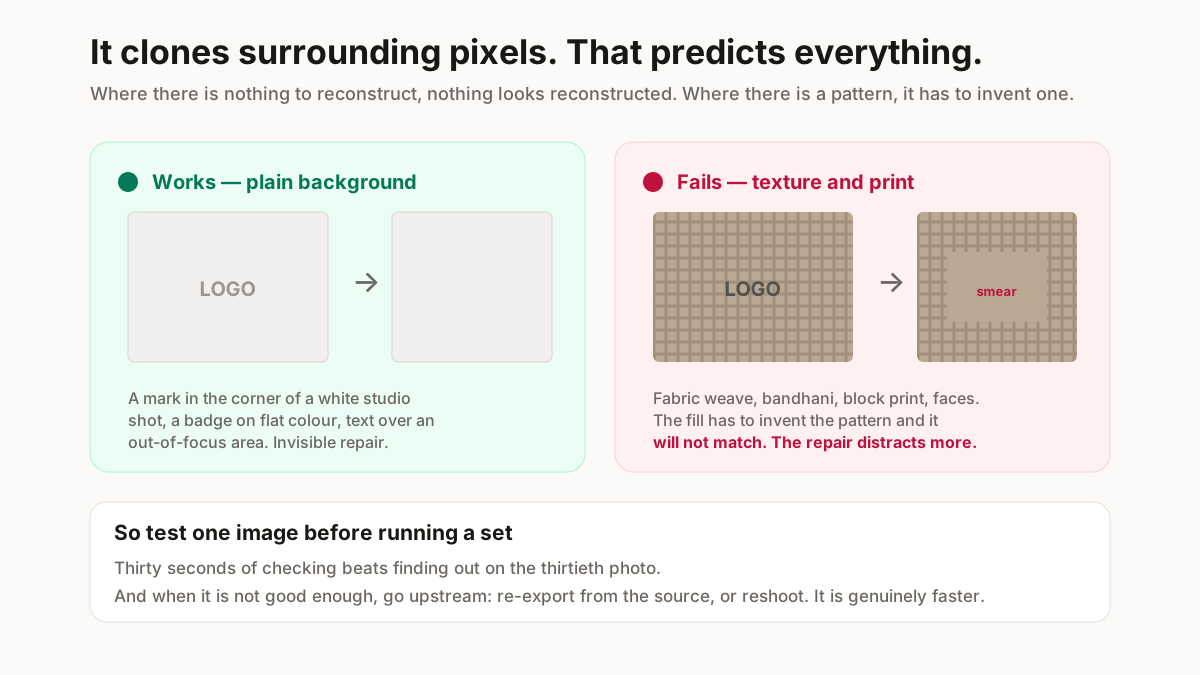
The tool clones surrounding pixels into the area you brush. That single sentence predicts every result you will get.
It works well on plain, even backgrounds — a mark in the corner of a white studio shot, a badge on a flat colour, text over an out-of-focus area. There is nothing to reconstruct, so nothing looks reconstructed.
It looks obviously wrong on fabric texture, printed pattern, faces and anything with structure. A watermark across a bandhani print cannot be filled convincingly, because the fill has to invent the pattern and it will not match. On a saree photograph the repair is more distracting than the mark was.
Test it on 1 image before running a set. 2 minutes of checking beats finding out on the fortieth of 40 photos, with the WhatsApp catalogue already half sent.
When the result is not good enough, the better move is almost always upstream — re-export from the source, or reshoot. That is not a fob-off. It is genuinely faster than fighting a clone tool, and the output is clean rather than nearly clean.
Is Photoshop better for this?
If you have it, Photoshop’s tools are better than any browser tool and worth the extra minute.
Generative Fill reconstructs plausible content instead of cloning it, which is a genuine step change on textured backgrounds. Content-Aware Fill is the older non-generative version and still strong. The Clone Stamp gives you manual control, which is what you want when automatic fills keep smearing.
The workflow that works: select the mark with a generous margin, run the fill, then clean the edges with the Clone Stamp at 20% opacity. On a batch of 40 images that is 3 to 4 minutes each, which is the real argument for fixing the export instead.
The same limits apply, for the same reason. On a busy print, even Photoshop is inventing what should be there — it just invents more convincingly.
Related free seller tools
Frequently Asked Questions
Is it legal to remove a watermark?
It depends entirely on whose mark it is. Removing one from your own export or an image you own is fine. Removing a photographer’s or a stock library’s is a licence breach and often a copyright infringement — the mark is there to identify an unlicensed copy, and taking it off does not license the file. This page covers only the first case.
Is this watermark remover free?
Yes, with no signup. It runs in your browser, so there is no upload, no queue and no per-image cost. The processing happens on your own machine.
Does it work on photos with texture?
Poorly, and that is worth knowing before you try. The fill clones surrounding pixels, so a mark over fabric texture, a printed pattern or a face has to be invented and it will not match. On plain backgrounds the result is invisible. Test one image before doing a set.
How do I remove the Canva watermark?
Not with a removal tool. A Canva watermark means one element in your design is premium — find it on the download screen, then either swap it for a free equivalent, buy that single element for a small one-off amount, or delete it. Any of those gives a clean licensed export at full quality.
How do I remove the Gamma watermark?
Gamma applies it at export on the free plan rather than putting it in your deck, which is why you cannot find it to delete. Exporting from a paid plan produces the file without it. If you already have the export, cropping works when the badge is in a margin, and our PDF watermark remover may lift it if it went in as an annotation.
Will the image quality drop?
The repaired area is reconstructed, so it is not the original pixels — that is inherent to any watermark removal. The rest of the image is untouched and stays at full resolution. Re-exporting from the source, where that is possible, always beats repairing.
Can I remove watermarks from a batch of images?
Not usefully, and no honest tool should offer it. Every watermark sits in a different place over different content, so the region has to be selected per image and the result checked per image. A batch removal would produce a folder of smeared photos you would then check one at a time anyway.
Does it work on PDFs?
No — this is for images. PDFs work differently, and a PDF watermark may be an annotation that lifts out losslessly, page content that needs editing, or pixels in a scan that cannot come out at all. Our PDF watermark remover inspects the file and tells you which you have.
Use this on exports you created and images you own. Removing a photographer’s or a stock library’s watermark is a licence breach, not a technical problem, and it is deliberately not covered anywhere on this page.